Since many of us are making hexagon projects, I have been asked several times to show someone how I make mine. Let me just say up front - - There are many ways to make the hexagons for Grandmother's Flower Garden style projects. If you have a way that you love, just keep on using it. This is for those of you who have wanted to do hexies, but were a little intimidated or simply could not figure out how to start.
I like to use a method that requires the least amount of time and gives me the best results. I am not fond of cutting paper templates, or sewing with paper templates. I have done some of those in the past. Once I discovered mylar templates I was off and running to use those for my projects. I discovered these by reading some one's blog and finding out where she ordered her templates.
When I read about The ScrappyAppleyard Quilt Shoppe and noticed they were located in my home state, I placed my order immediately. The templates I use are 1" size. They come packaged with about 80 plates to a package. Since these are re-usable I only needed 2 packages to give me all the templates I would need to do my Hexagon Star Quilt. As soon as all six sides were connected to another side, I would remove my template. This made handling the project easier as it became larger.
I will show you how I make each hexie for this quilt. I still have a few rounds to go before this is complete.
This is the packaging of the 1" mylar templates that I ordered from The Scrappy Appleyard Quilt Shoppe.
I cut 2.5" squares of the fabrics I am using for the project. Then I trim off the corners.
 Drawing lines and cutting exact shapes of the hexies was not "my cup of tea".
I place the mylar template in the center and secure it with a small applique pin. The punched hole in the center of the template makes it so easy to pin these on.
I begin folding down at each point around the template and tacking it with a couple stitches. These stitches are only in the fabric, not going through the mylar. A couple of stitches at each intersection is sufficient to hold it securely. At the last intersection I make a finishing knot.
Here is the finish.
 After they are completely tacked at all intersections, I remove the little pins from the center of the template.
I will note here that I use any thread that I have because it will never be seen. It is a good place to use up those spools of thread that have been around for a long time or that are of questionable content. These are basting stitches that will stay in the quilt. At least, I don't remove the basting stitches. So, if you have used rotten thread and in 5 or 10 years it rots out, it will not create a problem because the hexies have been sewn to each other.
Sorry about the quality of this picture. What I have done is put two hexies together with right sides facing and then I have used a very tiny whip stitch.
This is the place that the type of thread you use really matters.
I use a very fine thread. Many quilters use silk thread for this step and so do I sometimes. However, most of the time I am using a poly thread made by Wonderfil called Invisifil. It is very fine like silk but not quite as costly.
 Most of the time I use a cream or a white thread. Since it is so fine and my stitches are very small and close together it gives an invisible join from the right side. The exception to this would be if I were doing something with very dark colors then I would change to a grey or dark taupe.

 My needle of choice is a very small sharp in size 11 or 12. This is the same size needle that I use for hand quilting.
Notice the very short tail coming off the needle. I choose to tie a knot at the top of my needle after I thread it so that the thread will not slip out of the needle as I am sewing.
Using very fine thread allows you to tie that knot and it will slide right through the cotton fabric just fine.
Once I have put together several of these hexies and they are attached on all six sides to another hexie. I use my small scissors and pop the template out of the fabric by putting the point of the scissors in the little hole in the center.
It does not bother me that the fold over isn't exactly the same on all six sides. As long as it is enough to hold it securely until I can attach the other hexies, I am a happy camper or "hexer".
I hope this has been helpful. Please send me any question you might have and I will attempt to get you an answer that will keep you "hexing" or that will get you started on this fun technique.
-sandi

 Straight line quilting on a piece called "Spring Gardening".
 Hand piecing hexies for my upcoming class I am teaching at QuiltWeek Chattanooga in September.
 Finished the quilting on the "Leftovers Table Runner".
 Lots of straight-line quilting on little projects for my Trunk Show/ Lecture coming up in September.
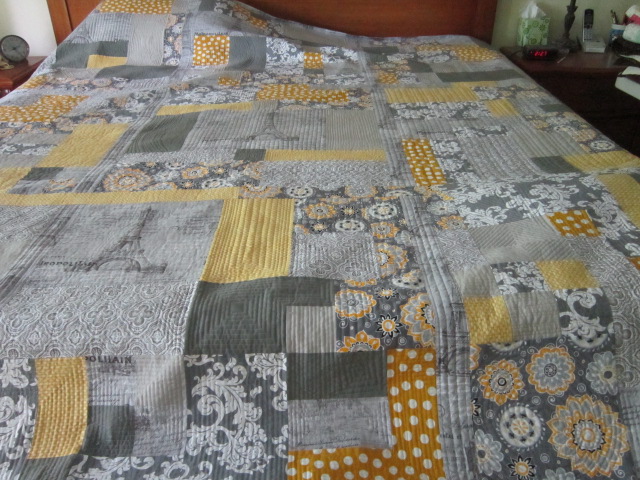
 Finally finished this queen-sized bed quilt in Improv and Quilt As You Go techniques.
 Straight line quilting on a piece called "Spring Gardening".