http://www.themodernquiltguild.com/

Monday, October 8, 2012

MODERN MYSTERY QUILT WEEKS 2 AND 3

I am a little behind in my weeks on the Modern Mystery Quilt.  This week I have worked on Weeks 2 and 3 at the same time.  Here are the blocks that I have completed.

Week 2 blocks.  I have not put the small strip in the middle.  Still trying to decide what I want to use here.  This is about half of the needed 30 blocks.


This is a few of my blocks for Week 3.  I will continue working on Weeks 2 and 3 as I do Week 4.  Maybe I will be caught up by Wednesday when Week 5 blocks appear.


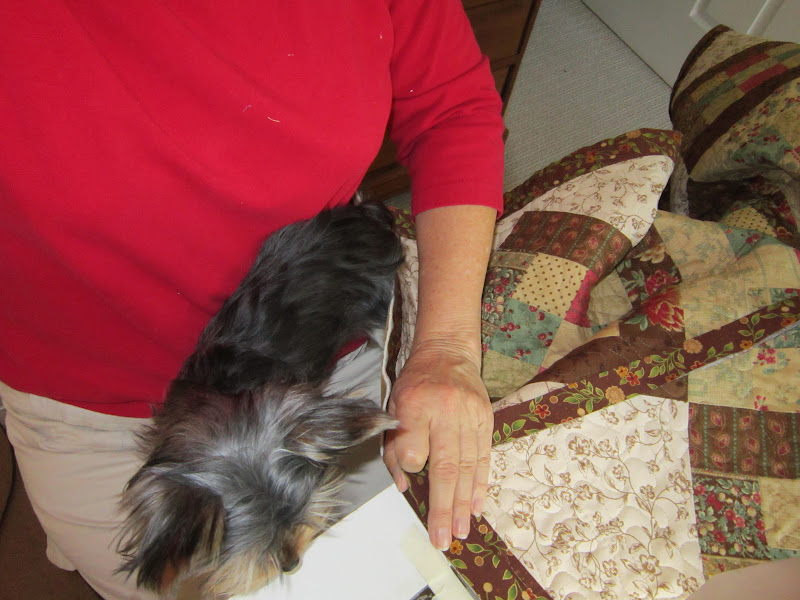
Of course, Lil Bit was a great supervisor.  She watched each stitch and every pin!

                                                -sandi


Friday, October 5, 2012

DECORATING FOR THE SEASON

There are some things that one should acknowledge about one's self and then make the best of it and go on with day by day living.  I am not very good at interior decorating.  I could look at magazines for days on end and never could I duplicate what I see.  It is pathetic.  My sister is a whiz at this.  She has one of the prettiest homes I visit.  Each time I go she has done something different.  Oh well, she can sing too.  Me,  I make a mean quilt!!

Having said all of that I am going to invite you to "tour" my home with its fall/autumn/Halloween decorations in place.  I have collected some things that I like and I use them in different ways each year.  Some of these things I have made and others have been purchased at shops and some really pretty things were made by friends of mine. 

Mostly I am just going to show you things I have "stuck" around and about.

I love this piece.  Last year my hubby and I went to the Ketner's Mill Fall Craft Show and I came across this cute little ghost.  That is metal roofing.  I thought it was just so creative.  It hangs on my front porch and in the evening it picks up the reflection from the street light.


This is a sweet little whimsical door piece that makes me smile and invites everyone to come inside.  It came from a retail store.


We have many rainy days in the fall months.  We have lots of trees, and, with trees come fallen leaves, and with fallen leaves comes tracking in onto the floors.  So I made this rug.  The technique is called "ladder hooking" and it is a monochromatic study in browns.  It does a good job inside the front door.  It is completely washable. 

Just outside the dining room is this narrow wall and it calls for something to fill it.  I made this piece last year using some of the orphan blocks I found in "The Drawer" of lost and found partial projects.  It does a good job setting the tone for the place mats on the dining room table (also made from "orphan" blocks).


I do love leaves, even those that get tracked in.  I have made another "leaves" piece to use on the glass top table in the family room.


Aren't these the cutest little
pillows you have ever seen?


My artist friend, Chris Sandow, painted these


little birds on silk.  I loved them
as soon as I saw them!


Originally they were going to be gifts for others, but I simply could not part with them. *sigh*


Don't you think they really make a fine addition to this fall floral arrangement?  This is really poor lighting but it is so rainy and foggy today.  The indoor lighting in my family room is not set up for good photography. 

Another fun piece I made was this wall hanging of witches.  The lowly Snails' Trail block really shines in this project.


Voted "Best Use of Artificial Eyelashes", this hangs over my fireplace in the family room.


I chose Ornamental Kale for the planter boxes on the front porch. I am anxious for them to "fill out" and show their stunning color as the fall months go on.  In the background you can see the yellow mums blooming.  They were planted last year and are not as large as I hope they will become over the years.


The Asparagus Fern still looks good and will probably hold until first frost or some really cold temperatures.  I added some silk flowers to the fern and left it in the plant stand beside the front door.  It is rather "mood" setting making a nice transition from summer to fall.


One lone, smiling pumpkin will sport a candle for Halloween.  This will be the invitation to "Trick or Treat" at our house.

After Halloween, I will add some more fall decorations and use some things for Thanksgiving.  It seems a shame to only get one month out of some of these decorations, but that is the way it is.

Happy Fall!!   Happy Halloween!!!


-sandi

Wednesday, October 3, 2012

MODERN MYSTERY QUILT WEEK ONE

AQS is sponsoring a Modern Mystery Quilt Project designed by Weeks Ringle and Bill Kerr.  I decided to join with several of my Guild sisters to do this quilt.

Week One was to select the fabrics and then make 10 rectangular blocks using 2 colors in each block.

Choosing my fabric was a lot of fun.  I immediately knew that I wanted to use brights.  The sample blocks done by Weeks were all solids, but I wanted to use prints instead.  I included one or two solids.

Here is my "palette" of fabrics.


I also pulled these other fabrics in the reds and oranges, but decided to hold them in reserve.  Not sure they play well with these.


It was necessary to choose a  background fabric that would contrast with the fabrics in the blocks.


I chose the soft grey.  It is a subtle contrast; however, it is darker than the lights and lighter than the darks.  I guess that is just what mediums are.  LOL   I think this will give the emphasis to the blocks instead of bringing the eye immediately to the background.  We shall see! 

After all, this is a mystery quilt.  That is the fun for me.  Taking the risk of not knowing the outcome forces me to trust the design journey.  I am always pleased with the results of my mystery projects and I have so much fun as I go along. 

 I don't try to "figure it out" ahead of time.  I like the surprise.  It would be like reading the last chapter of a book before I read the preceding chapters.  That would spoil it for me.

Here is a sample of my Week One Rectangle Blocks.


I am off to a good start.  Anxious to get on to Week Two construction.

Will keep you posted on my progress.

                                   -sandi


QUILTERS' PLAY DATE

I cannot think of anything I enjoy more than having a "Play Date" with my quilting buddies.  Yesterday was that day.

It started out early in the morning when my friends, Linda and Sharon, came over to "stitch a while".

Of course, there was a lot of chatter and laughing.  Laughing is the best aerobics for the soul!

Linda is working on a beautiful applique project with these lovely birds.  She is a member of the Applique Bee Group that meets at the local quilt shop and they are doing a sampler BOM of lots of "feathered" friends.  I cannot remember the name of the book they are using.  Linda is using hand dyes and they are gorgeous.  This is her current monthly block.

Sharon has a broken finger and this makes it difficult for her to use her rotary cutter and ruler.  She wanted to start making some hexies so I showed her how to do those.  She made a few and then had to rest her hand.  She is checking out Bonnie Hunter's "Texas Tumbleweeds" quilt in the current Quiltmaker Magazine.

That is my Hexie Star Quilt on the corner of the table.  Sharon was using it as a guide for making her hexies.  Don't you love that beautiful blue she has there and in her little plastic bag is a luscious brown and the print that she will use for the centers.


Of course, Lil Bit was there and she was helping me do the hand sewing on adding the binding to the  "Believe the Dream" quilt.


Sharon and Linda left in the early afternoon and the Piecemakers Bee Group arrived in the evening.  The Pbees, as I call us, is 6 women who began taking classes together and eventually evolved into a monthly Bee Group. 
We have done one group project in a Round Robin style using one of M'Liss Rae Hawley's books.  Each of us chose our own fabric and passed it from one to the other each month with each making 1 large and 2 small blocks to put in our finished samplers.  We had a lot of fun doing that.
Another year we made individual projects together and I taught them several different techniques in several little mini workshops.

Last night each of us was working on finishing something we had started.  Everyone was doing hand work.

This is Carol, and she is putting binding on last year's Sampler BOM that we all did together.  Love the pink and brown and her ribbon border is stunning.


Phyllis had a completed table runner in nice golds and browns.  She also had one of her log cabin blocks to show for the Eleanor Burns' Christmas Wreath Wall Hanging she is making in a class she is taking. 

Her other "Show and Tell" was a completed project from our last Workshop on the Lake.

Linda had her project from Workshop on the Lake as well.


Isn't this gorgeous??  Linda made this as a BOM at a nearby quilt shop.  It was the Saturday Sampler.


Suzan was telling us about baby sitting her new grandson.  She is the sitter for Mommy to go to work each day.  Later on she was learning to make hexies, too.


I was adding the binding to my "Quilter's Playhouse" quilt.


We missed Sandy, who is away on vacation.  She will be back with us next month.

Maybe I will have another post from this group next month.  Are you inspired yet??


                                     -sandi

Tuesday, October 2, 2012

MAKING DO

One of my blogger friends used this button recently to talk about not buying more fabric until she had used up some of her stash.  She challenged all of us to join in the Making Do! project.  I took the button and decided to use it whenever I wanted to pull from my stash, or to use some leftover blocks, or to make a project completely without going shopping. 

Since I started quilting I have saved lots of pieces of fabric and thread and, of course, batting.  I keep these things stacked up in my closet in the studio with the intention of using them for future projects.  Sometimes it happens, but mostly they just stay in the stack.

Recently I decided to sort out the batting.  Occasionally I take some of my larger quilts to a Longarm Quilter who asks her customers to purchase packaged batting to bring with the quilt.  This usually means that it is a batting that is quite a bit larger than the finished size of the quilt. There is always batting to be trimmed off later.
When I use this particular LAQ I try to always choose the same brand and type of batting with the idea that I would be piecing batting together for smaller projects.


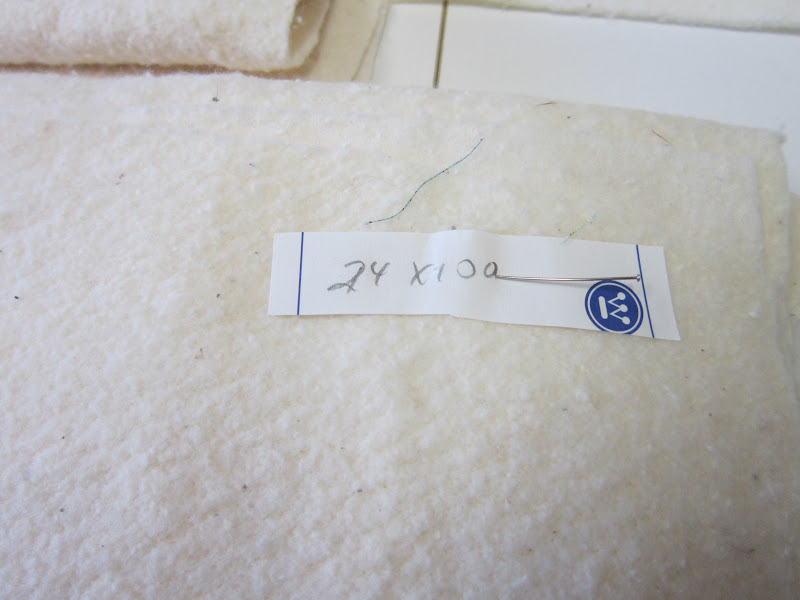
The first thing I did was measure all the stray pieces of batting and I labeled them with the size written on a piece of paper.  A friend of mine who uses this same LAQ also gave me some of her leftovers.


When I completed the top of my last project called "Believe the Dream" I measured it and decided to make a pieced batting.


All of the batting was the same 100% cotton but some of it was white and some of it was cream.  That did not matter in my case since the quilt was scrappy. 


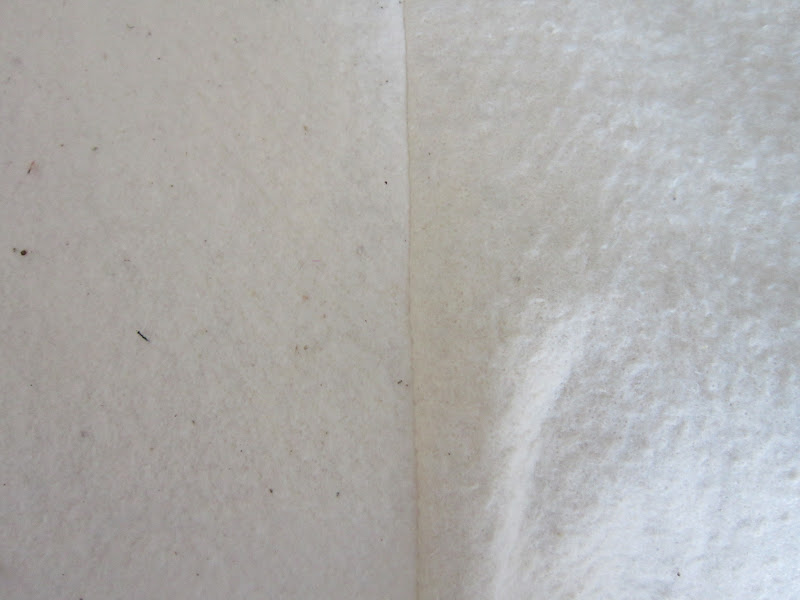
I simply butted them together and used a zigzag stitch to join them.  I have seen many ways to do this including layering the two pieces and cutting a serpentine line.  Since I knew I was going to use a dense quilting pattern on this project, I opted to simply stitch with a zigzag.  It holds it together well enough that there is no separation during quilting.

When the project was completed you could not tell the difference in the pieced batting and a similar project that would have been a solid piece of batting.

This particular project was a Making Do! project from start to finish.  I used up leftover blocks from another project; I used up a bolt of fabric that had been in my stash for a long time to make the backing; and, of course, I used the pieced batting.

WOW! what a great feeling.


And the quilt ain't bad either!!
                                     -sandi

Monday, October 1, 2012

WIP #4 FARMER'S MARKET

Here it is October and harvest time of the year.  The leaves are starting to turn on the trees and the air is getting a little crisper here in southeast Tennessee.  My hubby and I are enjoying some nice porch weather. 

The time has come to draw another number from the WIP jar.  This month's number is

This corresponds to a collection of "Lady of the Lake" blocks in bright colors.


Of course, I want to finish the total number of blocks that I need for an original layout/setting I have in mind. I think it will take 81 blocks for the quilt.

Stay tuned for the grand unveiling on or before October 31st.  Of course there will be other projects thrown in during the month.  Some will be new ones and some others may be more unfinished projects.

Join me in finishing one of your WIPs this month, then let me know about it.

                                                            -sandi


Saturday, September 29, 2012

BELIEVE THE DREAM

Earlier in the summer I decided to find a way to clear up some of my WIPs so I made a list and put the numbers in a jar.  Each time I asked my DH to pull one out for me.

In August he pulled a number from my WIP jar and it was to be completed that month. 
He pulled #8, which was a bunch of extra 9-Patch blocks that I had made for another project.  I had planned to use them for the backing of the first project and, then, I changed my mind.
I set them aside with the idea of making more blocks if necessary and to put them into another bed-size quilt.  The longer I looked at them the less I wanted to make that large quilt.

When I pulled them out after their number was drawn in August, I still was not inspired.

I tried several layouts and nothing was keeping my attention.  See my post at   http://frogpondstudio.blogspot.com/2012/08/wip-3-in-progress.html.

August was a very busy life month for us.  We had the Longest Yard Sale and my husband had his first hip replacement surgery.  This cut into my studio time and WIP #3 did not get finished so I carried it into September. 
I was still struggling with a layout.  I wanted something that was un-traditional with these traditional blocks. 


At first I put brown frames on the 9-Patches that were light in the corners and I put neutral frames on the blocks that had green in the corners.
This gave me an uneven number of blocks.  I tried the above layout and knew I would need more blocks.  This layout was predictable and not terribly interesting.


Here is another predictable layout.  Still not exciting.


So I tried these checkerboard squares and tried offsetting the rows.  Nope, not working!

Then I came upon a new layout.  I chose a lighter neutral fabric for the setting triangles to help "float" the interior pattern.  I also chose an asymmetrical arrangement of blocks.  It is not predictable; It is a little bit nontraditional; It is a bit modern.  I like it!


This time I used one fabric for the backing.  It has the word "Believe" on it.  I meander quilted it using an olive shade of thread, (Superior # 617), which blends well with so many fabrics.


Lil Bit helped me put on the binding.

She watched the needle very closely.  She didn't even mind when the quilt was piled on top of her.


Lil Bit and I are very happy with the finish of this WIP.  "Believe the Dream" has turned out to be a fun quilt after all.  We can snuggle under this to watch TV this winter.

                                            -sandi

Tuesday, September 25, 2012

LEMONADE STAND


From Espresso Junction to Lemonade Stand.  The original pattern was done in shades of brown with black accents.  I wanted a yellow quilt so I changed mine to yellows and teals/blues and re-named it "Lemonade Stand".
These were the fabrics I wanted to use.  To these I added some leftover strips from some other projects.


The first step was to create strata strips with the yellows that would be cut into blocks.


Next, I chose the teals/blues for this quilt.  The fabric at the very top of this picture is the fabric to be used to make the snowball blocks with the strata squares.

The other fabric used for making the snowball block was a neutral.  It is difficult to see the pattern in this fabric, but the name of the fabric is "Whitecaps".
I


I started making the snowball blocks.  There are  a lot of these to make and all are not configured the same way.


Trimming off the corners of the snowball blocks left these little triangles.  Not sure how I will use them, but, for now, I will simply hold on to them and see what comes to mind later.
A sneak preview of four blocks.  Do I like the color combo??? 
I.  LOVE.  IT!!!


First section is complete!


The first side inner borders are added.  Love the border triangle color contrast.

It has taken me a little while to get back to finishing this project.  Here is the top with the teal/blues border added.


Guess who is sitting on top of the quilt???

I wanted to show you these interesting scissors that a friend bought for me at a Sew and Vac store in Scottsboro, AL when we were on retreat.


I hope you can see that they are curved.  It makes it so much easier to cut around things.  I used them to trim the batting for the quilt sandwich.


I laid the batting out on the floor and put the backing on top of it and used the curved scissors to cut the batting to size.  Since the scissors were curved they did not get caught in the carpet at all.  It was so much easier than using my Dressmaker's Shears.  By the way, they are made be Gingher and only cost me a couple dollars.  I love a bargain.

This backing is made from the leftovers from the front of the quilt.

Of course, Lil Bit has to be in the picture!

The finished quilt hanging on my porch rail in the early morning light.


My friend, Ava, is teaching a class using this pattern at our local quilt shop, Sew Bee It, in November.  She asked if I would let her hang my quilt with her sample of the quilt to show the two different colorways.  I was happy to drop off my quilt to the shop owner to hang for a couple months to promote her class.

Another finish for September!

                                         -sandi