http://www.themodernquiltguild.com/

Sunday, November 23, 2014

NEW CURTAIN

I like to make home dec items using my quilting skills.  Recently we were discussing Gwen Marston's technique at my Modern Quilt Guild.  Gwen makes these small pieces of works that she calls sketches.  Sometimes they are complete in themselves and at other times they lead to a larger piece of work.

I love the rainbow colors and I use Kona solids a great deal.  I love how the quilting shows up so well on the solid fabric.

I decided to make a sketch piece using Kona medium grey for the background.  I called this little piece:  Roy G. Biv #1


This was a piece to practice on and then I increased the size and changed the design a little bit and made a larger piece called Roy G. Biv #2.


This became the curtain for the small window (24" x 36") in my Powder Room.


The two pieces hang together.


The room is so small it makes it difficult to get a really good picture.

I love how this looks in the daytime with the sun shining through it.


The recycled stained glass window pane hanging above it has the same colors.  The yellow in the ellipse does not photograph very well.


My DH and I found a stack of these windows about 25 years ago on Factor's Walk in Savannah, GA.  We bought several and have enjoyed them in our homes over the years.

-sandi

Wednesday, November 12, 2014

CLAMSHELLS

Today should have been spent cleaning up my studio and organizing the projects that need to be ready when I go to Retreat next week, but, instead, I got a little sidetracked.

A while back I made some clam shells.  They were cut on the Accu Go machine at my local quilt shop.  I put them up on the design wall.  After looking at them for a few days I decided to make a pillow.


It was easier to applique the clam shells on the pillow top so I faced the clam shells with the same fabric as the background.  This made them a little thicker and the background blended better.

So the top was made and I made the quilt sandwich and pin basted it.  That has been lying on my worktable for several weeks...
 

Today I was trying to get projects ready to take to Retreat.  I thought I would finish this pillow top at the retreat so I set out to get the back pieces cut so I could sew it all together next week.

One thing led to another and voila! I had a pillow top made.

Organic straight line quilting in the top part of the pillow:

Serpentine quilting in the lower part;


After assembling it into a pillow top I tossed it in the washer and dryer to get the "crinkle" look.


I really love this!!

-sandi


Wednesday, November 5, 2014

LET'S DO IT AGAIN!!

I have been using up random blocks from my leftovers drawer to make practice pieces for piecing and quilting.  I keep one near my sewing machine all the time.  It is a great way to test thread, stitch length, and tension.  When I finish I have a place mat that can be used for our daily meals.  Of course, they don't all match, but that is okay by me.

This is the last Maple Leaf block leftover from a set of step outs I did when teaching this class.

It has been used for practice for several months and today I have finished it off.


The binding came out of another drawer where I keep leftover remnants of binding I used for other projects.  I try to use the same width binding for all my projects and it makes it easier when I want to drag pieces out to use on a different piece.


I chose this plaid binding.  


I discovered that I had used it on one of the other place mats.
Take a look at the quilting techniques on these place mats.  They are not great work, but they served the purpose of me practicing and learning them so I could use them on my other pieces.

My favorite thread is Superior Threads Bottom Line in Shade 617 which is a taupe color and it goes with everything, even navy, black, and dark brown.  I use it for piecing and also for quilting.
 For projects that will be used and laundered a great deal, I usually add the binding by machine.  I think it is more serviceable and durable.


Okay, enough about the place mat, "Let's eat!"

-sandi

Tuesday, November 4, 2014

LIL BIT GETS A NEW QUILT!

LilBit likes to share the love seat with me when she has a snack or a treat bone.  Well, being the spoiled princess that she is, allows her the privilege of doing just that.  I put a quilt on the love seat to try to protect it from her food mess.  


This is a quilt I made using some of my step-out blocks from Snail's Trail Class that I taught a couple of years ago.


I decided that she needed a new quilt with a fall theme.  I had a bunch of strips left over from another project.  Imagine that!


I decided to play "What if . . ." and make improv blocks.  I started out making some wonky log cabin blocks.


What if...

I decided to use up more strips and make some strata blocks that I then cut to size to go with the wonky log cabins.


What if ...
I make a center block of dark strips.  Then cut these in half twice on the diagonal and re-sew into one 12 inch block.


Now what if....
I put these together into a 9-patch design???
I am not so sure the center block was effective, but it will remain.
What if I add a border,,, or not??

NOT!!!  This quilt did not need a border!  It was more interesting on its own.

Now for the quilting. . .

I love straight-line quilting.  On this quilt I chose to use simple flannel as my batting with a cotton backing so the quilt would launder and dry quickly and easily.  When I do straight-line quilting with regular batting I get a stronger texture than I got on this piece.

In two of the corners I chose to do rays.
I learned that it would have been better to originate my base on the opposite corner because the collection of threads in that upper right corner was tedious to say the least.  It was quite a build up and burying that many threads was a chore!

In the other two corners I chose to go back to working the stair step pattern.  I really like this pattern because a secondary texture usually develops at the intersection.


The secondary texture is not as evident here because of so many lines on the logs.


The strata blocks were quilted in sets of lines with a very organic feel to them.

And in the center I chose to do a spiral.  Again, lesson learned here was those blocks were way too busy for that design to show much.
Using all of these batiks made the pieces very busy and less clean looking.  I think this is still an example of a quilt with a modern aesthetic, but it would have been more interesting with less busy patterns on the fabrics.


This was a really fun practice piece and has turned into a cute little quilt for LilBit to snuggle into on the love seat.  It measures 36" square.


Here is a look at the quilt hanging up.


The indoor shot gives you a better perspective of size with it hanging over our fireplace.  The outdoor piece appears larger.


"Hey Mom, I love my new quilt.  Thanks", says LilBit.


                                                        -sandi


Monday, November 3, 2014

LEFTOVERS

I lived in the country when I was a girl and my mom was a stay-at- home mom.  She was also a great cook!!!  Even when our income was meager, she still managed to put together meals for us from leftovers.  Sometimes the leftovers were much better the second time around when she had added other ingredients to them and changed what they looked like the day before.

I have talked about the "drawer" in my sewing room that contains lots of leftovers.  Sometimes it is blocks, sometimes it is components of blocks, and sometimes it is simply scrap strips.

Here is what I found in the "drawer" the other day.


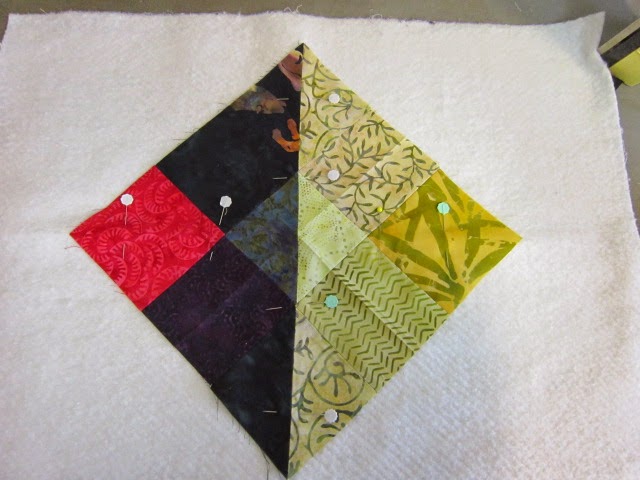
This is a leftover split 9-patch block made using batiks.

I looked around until I found a bin of leftover batik strips.

Then the fun began.


I decided to make a place mat with this block placed on point.
I could build it out by Quilt As You Go and Flip and Stitch.

The first thing I did was quilt this block.
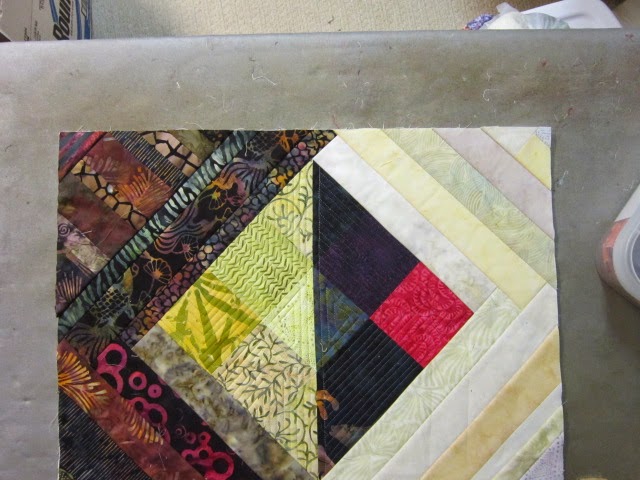
Here is the way it looks on the back.

I thought this was pretty cool!!

Then I started adding strips to the four sides of the diamond.  I decided to reverse the value of the strips to the block.  Light against dark and dark against light.


Since I was using Stitch and Flip Method here, I did not need to add any more quilting.

I really like how it looks.  And on the back it looks pretty neat too.


I pulled some strips out of the bin and made the binding.
I decided to complete the binding on the machine to make it sturdier because this place mat will get a lot of washing.


Of course, there is only one of these, but I don't mind that every one's place mat is different at my house!!  After all, this was a practice piece for trying some straight-line quilting and using up some leftovers.


                                                     -sandi