http://www.themodernquiltguild.com/
Showing posts with label Making Do. Show all posts

Friday, December 6, 2013

GIFT BAG

I needed to wrap a gift and I was sure that I had an extra Christmas gift bag left over from last year.  Each bag I checked was either too small or way too large.

It is pouring rain and a real mess outside, so I decided not to go shopping.  I started looking for some fabric scraps to make my own version of a Christmas gift bag.

I found this cute Christmas fabric with holly and red berries for the bag.  Then I went to my solids drawers and found some solid red fabric for the lining.

I cut two pieces of each fabric.  In my sample I cut 14 inch squares.  You could change the size of this to fit whatever you want to wrap.

The first step was to sew the outside squares of the bag together and also sew the two squares of  lining of the bag together.  Sew around three sides.  I used a quarter inch seam but shortened my stitch length a little bit.  Leaving the top of the bags open will allow you to nest them later.  Also, it is important to leave a small opening at the bottom of the lining.


This little ruler is one of the handiest tools I own.  It is made by Perkins Dry Goods and is designed to help you get a true quarter inch seam.  I use it for many other things too.
 
In this project I am using it to draw a one inch square in all the corners. 
 
 
This will help me form the gusset to get the shape of my bag.
 

By forming a triangle with the corner you now have a line to stitch on.

Now I have two bags with corner gussets sewn in.

The next step is where you put the lining of the bag inside the outside bag right sides together.  I inserted the handle between the lining and the outside making sure that it was well out of the way of the stitching line.

I sewed a quarter inch seam across the top of the bag all the way around.
Now it is time to turn the bag right side out.  This is where that section at the bottom of the lining that was left open comes in handy.


Pull the outside bag through the opening and smooth it out making sure that the lining corners nestle into the corners of the outside bag.


Use a very narrow seam to sew the opening in the lining bottom closed.


Two rows of top stitching will finish off the bag.

I did not use any batting or interfacing because this is a gift bag.  If you want a sturdier bag you could have used batting or fusible interfacing.

My gift bag is finished and already filled with a special gift for someone.

                                           -sandi


Wednesday, January 9, 2013

TRADITIONAL JOINS MODERN

Here we are in January 2013.  A New Year and a continuation of many good years.  This year promises to be an exciting time for my quiltmaking.  I am delving into doing more Modern Quilts. 

Thought I would give you a little history lesson to help explain the name of the first finished quilt of 2013.


Share

January is often considered the month for deep reflection. We look back at the year behind us, bemoaning our regrets and celebrating our successes. And then, we look forward to the future year. We make well-meaning resolutions and hope for the best. So, in this way, we’re all a little bit like Janus, the Roman god for which January is named. Janus is usually depicted with having two heads. that face in opposite directions. One looks back to the year departed, and one looks forward to the new and uncertain year ahead.


Janus also represented transition and was called the "god of doors".  This is where I am - making a transition in my quilting style and opening some new doors for creative expression.


The back of this quilt came from "the drawer".  You know, that drawer that is full of parts and pieces of projects that never made completion?

I reached in the drawer and drew out the largest piece I could find and used it as my starting point for piecing the back.  I continued to pull pieces from the drawer.  If the piece was too long, I cut it off.  If it was too small, I added strips to it.  Eventually I had it completed.


All of these blocks are very traditional with lots of calicoes and prints.


Now let's take a look at the front of this quilt!! This is from Weeks Ringle and Bill Kerr's pattern called Deep Breath.


"Janus:  From Traditional to Modern"

I enjoy piecing my backs as well as my fronts and this seemed to tell the viewer what kind of quilter I am. . . a little bit traditional leaning toward the modern.

This quilt was completed entirely on my domestic sewing machine, a Bernina Artista 640E.

The straight line quilting in the neutral squares stands out from the pebble quilting in the pieced units.


                                       -sandi


Friday, November 16, 2012

IS THIS A SERIES?


In general, I do not make the same quilt pattern repeatedly.  However, this is my fourth Friendship Star Quilt.
The only other time that I have made multiple quilts from the same pattern was when I was teaching Beginning Level Quilting Classes. 
The pattern I chose to use was the Log Cabin and I ended up with several of these.  Each time I would teach the class I would think of another set of fabrics that I thought would look wonderful in that pattern.  Of course, the Log Cabin is another example of a value study quilt.  Each block is composed of a light side and a dark side.

The first Friendship Star Quilt I made was for a Value Play Workshop Retreat that I taught a few years ago.
This quilt was scrappy and I added a rather traditional border to it to give it a finished look. 
I loved this pattern and decided I wanted to make another one someday.


Recently my sister asked me to make a quilt for her to use as a gift for her son for Christmas.  This was the perfect opportunity to make a Friendship Star Quilt where I could use lots of scraps.  I wanted it to have a modern look so I omitted the borders. 


I also made another one.  When my daughter saw it she love it.  This one has fabrics in it that she remembers from other projects I have made over the years.  This is what is so special about scrappy quilts.  They often bring back wonderful memories.


Then I wanted to make a quilt as a thank you for a friend of ours who has been so helpful during my husband's hip replacement surgeries.  In this one I chose mostly browns and blues. 
Friendship Star seemed like the obvious pattern. 

Of course, now that I am on number four, it seems like a series.

  I laid out the blocks and carefully labeled them so that they would all go together in the proper arrangement.  Look closely and you will see that I turned one of the blocks the wrong way. 
I could tell you that that is a "design alternative" or that it is a "humility block".  But the truth is I made a mistake and I am not going to re-do this quilt. I did not see this until after the quilt was quilted and bound and posted to Facebook. 

 Oh, well, I know that our friend will enjoy this quilt and it will keep him warm even with one block that is turned wrong.  A life lesson I have learned is that perfection is not my goal.  Enjoying the journey and sharing my passion is.

This quilt made me smile and I think that it will make others happy.
I have made enough quilts using this pattern now.  My next quilts will use some other pattern.  Stop back by to see some of my other ideas.

                                          -sandi


Wednesday, October 24, 2012

A DAY OF CUTTING AND SEWING

I spent today cutting about 500 three inch squares in lights and darks.


Then I cut some 3.5" strips to make about 200 Half-Square Triangles.

I used my EZ Angle Ruler to cut the half-square triangles.


Here is my basket full of HSTs ready to be pressed.

Tomorrow I will make Split 9-Patch blocks and get started on another Friendship Star Quilt.

This is what Lil Bit did!


She sat in her bed chewing on her Chew Bone with her little "doggy"  toy.

Our day was busy and productive.

                                                     -sandi

FRIENDSHIP STAR QUILT

What a gorgeous fall morning it is!!  The sun is shining and the air is crisp.  The leaves are starting to turn here in southeast Tennessee and, occasionally, you can smell the aroma associated with leaves burning.  That always reminds me of my childhood.

It has been a week since I last posted because I was having difficulty with my camera settings.  I think I have solved it now with some help from my friend, Ava.  The pictures that follow may not be as crisp as some from earlier posts but, at least, I can now post them.

My sister asked me to make a quilt for her to give her son for a Christmas gift.  I wanted something that was masculine, but not just sports, motorcycles, and race cars.  I went into my stash and started pulling out fabrics to use.  I narrowed it down to a predominance of blues and browns.  Again this quilt will qualify for the category of "Making Do" that I pledged to try this year.  Using fabrics from my stash without making a significant fabric purchase is a real reward in itself.  After completing this quilt, I had hardly made a dent in my blues and browns.  The neutrals are showing some "denting"  so I may have to replenish those as I go along if I want to keep using neutrals for backgrounds.

The pattern I chose is the Friendship Star made from split 9-patch blocks. This layout is similar to the way you would lay out a Log Cabin quilt top.

The neutrals vary from very light to dark light and even some with an orange floral.  There are a couple of  other "ringers" thrown in for interest.  I think putting a few patches of red in the darks and a few patches with pale pink or yellow in the neutrals gives some spark and energy to the overall pattern.

Working scrappy is a challenge for some quilters.  I have tried to encourage my buddies to give it a try.  I firmly commit to the mantra "Value makes the statement in a quilt, but Color gets all the credit".  Scrappy quilts allow you to be free with a color palette and use anything/everything in a color family regardless of its theme or style.  My one hesitation is not to use Batiks and plaids with most other fabrics.  My reason for that is not that they would not work.  They certainly would.  I just like to keep my Batiks as a separate category because en masse they give such a unique look to a quilt.  The same is true for plaids in general.  My personal preference with plaids is to make them a focal fabric and have the background/neutrals play a supporting role.  Just my opinion, you see.

This particular layout has a little modern twist to it.  It is a variation from one of Karen Combs' layouts in her book, "Combing Through Scraps".

The center detail:


The quilt measures 63" x 81".  My sister asked me to make it for him to use on his sofa for TV watching with his girl friend.  I think it will be perfect for that.

I chose to leave it without a border --  this again lends itself to a little more modern approach.  It allows the design to drift off the edges of the quilt.

I am making three more of these quilts for gifts.  I will post more pictures as I finish each quilt.  Choice of fabric certainly changes the look.

Enjoy!!

                                                 -sandi

Tuesday, October 2, 2012

MAKING DO

One of my blogger friends used this button recently to talk about not buying more fabric until she had used up some of her stash.  She challenged all of us to join in the Making Do! project.  I took the button and decided to use it whenever I wanted to pull from my stash, or to use some leftover blocks, or to make a project completely without going shopping. 

Since I started quilting I have saved lots of pieces of fabric and thread and, of course, batting.  I keep these things stacked up in my closet in the studio with the intention of using them for future projects.  Sometimes it happens, but mostly they just stay in the stack.

Recently I decided to sort out the batting.  Occasionally I take some of my larger quilts to a Longarm Quilter who asks her customers to purchase packaged batting to bring with the quilt.  This usually means that it is a batting that is quite a bit larger than the finished size of the quilt. There is always batting to be trimmed off later.
When I use this particular LAQ I try to always choose the same brand and type of batting with the idea that I would be piecing batting together for smaller projects.


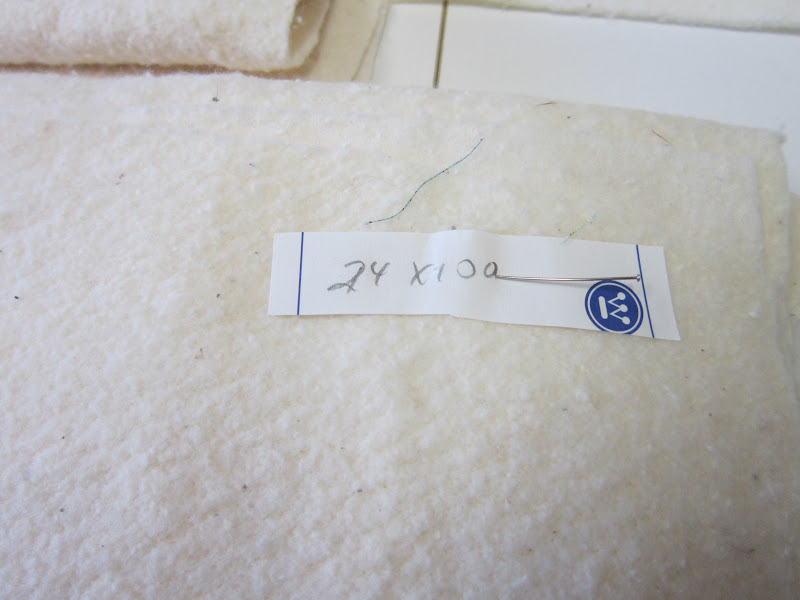
The first thing I did was measure all the stray pieces of batting and I labeled them with the size written on a piece of paper.  A friend of mine who uses this same LAQ also gave me some of her leftovers.


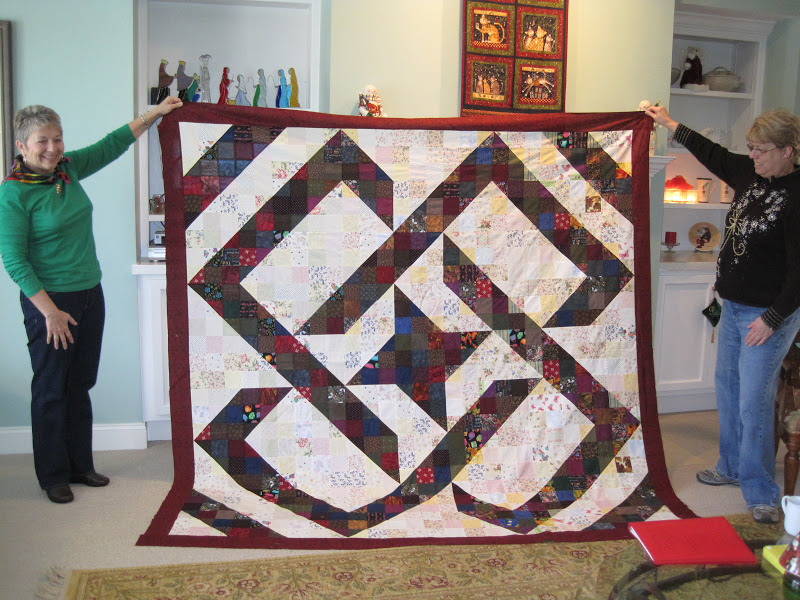
When I completed the top of my last project called "Believe the Dream" I measured it and decided to make a pieced batting.


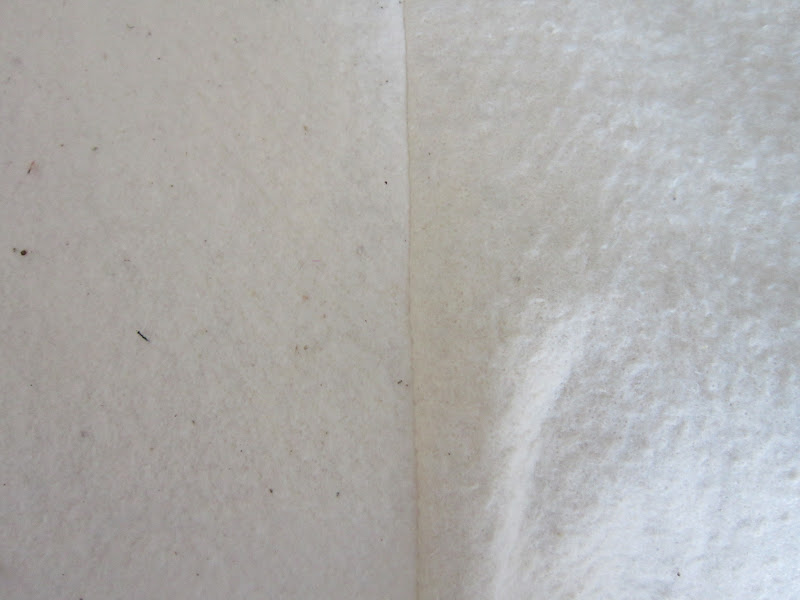
All of the batting was the same 100% cotton but some of it was white and some of it was cream.  That did not matter in my case since the quilt was scrappy. 


I simply butted them together and used a zigzag stitch to join them.  I have seen many ways to do this including layering the two pieces and cutting a serpentine line.  Since I knew I was going to use a dense quilting pattern on this project, I opted to simply stitch with a zigzag.  It holds it together well enough that there is no separation during quilting.

When the project was completed you could not tell the difference in the pieced batting and a similar project that would have been a solid piece of batting.

This particular project was a Making Do! project from start to finish.  I used up leftover blocks from another project; I used up a bolt of fabric that had been in my stash for a long time to make the backing; and, of course, I used the pieced batting.

WOW! what a great feeling.


And the quilt ain't bad either!!
                                     -sandi

Sunday, August 12, 2012

WIP #3 Progress

This is where it started.  Some 9-Patch blocks, some squares, and some jelly roll strips.


First set of blocks framed out in neutral colors.  Will probably need to make one more block.


The brown blocks were framed out and put on the design wall.
Hmmm, I don't know about this. . .

Had another idea
Maybe I will offset the rows and make a pieced border of the red and cream squares.


It is improving, but it still does not sing!!

Okay, let's try another layout.

Starting to hum a little tune here, I think. . .   This will require two more dark framed blocks.

Enough for now.  I will post as I reach the finish line!

                                     -sandi