http://www.themodernquiltguild.com/
Showing posts with label Tip of the Day. Show all posts

Saturday, February 9, 2013

MADRONA ROAD CHALLENGE BLOCKS


These were the fabrics in my packet for the Madrona Road Challenge Blocks that my Modern Quilt  Guild is participating in.
Fabrics were provided by Michael Miller Fabrics.
 
Our challenge was to use these fabrics in as many blocks as possible made in a wonky log cabin style that was introduced in our program book,  Quilting Modern, written by Jacquie Gering and Katie Pedersen.
 I made two blocks.


We will turn these in to the chairman of the Challenge at the February meeting. 

TIP OF THE DAY:

A little tip I have when you make blocks that you will be sharing with a group and blocks that will be handled several times before use is to back them with Freezer Paper.  This keeps the edges from fraying and the Freezer Paper can be peeled away when it is time to sew the blocks together.


I had enough fabric left over to make these little "pods".  These are great little fillers or they can be used in a border for accent.
I offered a tutorial on how to make the pod blocks on this site.
January 18, 2013
 
 
Our Modern Quilt Guild is so much fun!!!  We are growing in membership and having lots of good sharing of ideas in our meetings.
 
-sandi 

Wednesday, July 18, 2012

TIP OF THE DAY


CLEANING THE IRON


I am sure your iron never looks like this. 


But, since I am fond of using spray starch for my fabric, this happens to my iron on a regular basis.

 My mom always used a sheet of waxed paper with table salt poured on it to clean her iron.  I did that when I first started housekeeping.  Sometimes it worked very well, other times not so well.  Over the years I have tried numerous products and tips to clean my iron with varying degrees of success.

Along the way someone told me about Mr. Clean Magic Erasers for cleaning the iron.  I use these all the time to clean my showers, etc. in the bathrooms.  Now I use them in my studio to clean my irons.


 Begin by saturating the sponge with water.  I have mine so wet it is dripping water.  Place it on a folded hand towel and take it to the ironing board.
Heat the iron to the highest temperature setting.  Now iron over the wet sponge.  Do this as long as there is any residue on the sole plate.  Turn the sponge over and do a little more ironing on this side.
When you have finished cleaning the iron, the sponge will look something like this
and your iron will look like this.


It is probably a good idea to take a few minutes regularly to clean your iron this way.  I try to do this often enough that the buildup is minimal and it only requires a little time and effort.

                                       -sandi

Monday, July 9, 2012

TIP OF THE DAY

There is always a debate about whether to wash or not wash fabric before using it in a quilt.  For most of the time I am one of the "not wash" group.  However, when I use some fabrics that I have picked up at a yard sale or a flea market, I always want to wash them.  I like the stiffness and the finish that is evident on new fabric.  The sizing on the fabric makes it easier for me to get good cuts and have less stretch.

After washing fabric, all of the sizing is missing.  To regain that texture and feel,  I started using spray starch.  At first I used regular spray starch until I discovered Faultless MAXX.  I started using it and loved how it worked.   Next came another product called Best Press and I tried it.  I liked it for some projects but it was not strong enough to give the finish I truly wanted.  But it did have this very nice aroma.


  I like the heavy duty stiffness of MAXX and I love the aroma of Best Press.

Both of these products are costly and I use them liberally. I wanted to see if I could find something that would be a little better for my budget. 

I found a "recipe" on line to make my own spray starch.  It called for several ingredients and I decided that I could alter that and come up with something that would work for my projects and have fewer ingredients.  After a good bit of experimenting I found what I was looking for.

I like a pump spray instead of an aerosol spray so I saved my container from MAXX and chose to use it for refills of my "home brew" starch.


I use equal parts of Febreze Extra Strength liquid and Sta-Flo Liquid Starch.  Of course, if you like a less stiff starch you could use less starch and more Febreze.

I get the best qualities of each product:  the heavy starch and the lovely aroma. 
I mix the ingredients well and then pour them into my empty MAXX bottle and I am ready to start my next project.

Making my own starch is so much better for my budget and I just like the feeling of "homemade".

-sandi

Wednesday, May 2, 2012

SPRING WORKSHOP RETREAT


Workshops and Retreats are two things that most quilters really enjoy.  Recently a group of 5 friends decided to have a Workshop/Retreat and I was the teacher.
I chose a project to teach them a couple of new techniques.  They were going to learn to make Flying Geese blocks using Eleanor Burns' Flying Geese Ruler.  The other technique was to make prairie points and use them in the interior of the quilt as part of the border.
One of the gals found us the perfect location.  This is the clubhouse of PYC out at the lake.  Look at that blue sky.


Aren't these sailboats beautiful?
And our view from the work space.


The tables are set up and the extension cords are in place.  We are about ready to start.

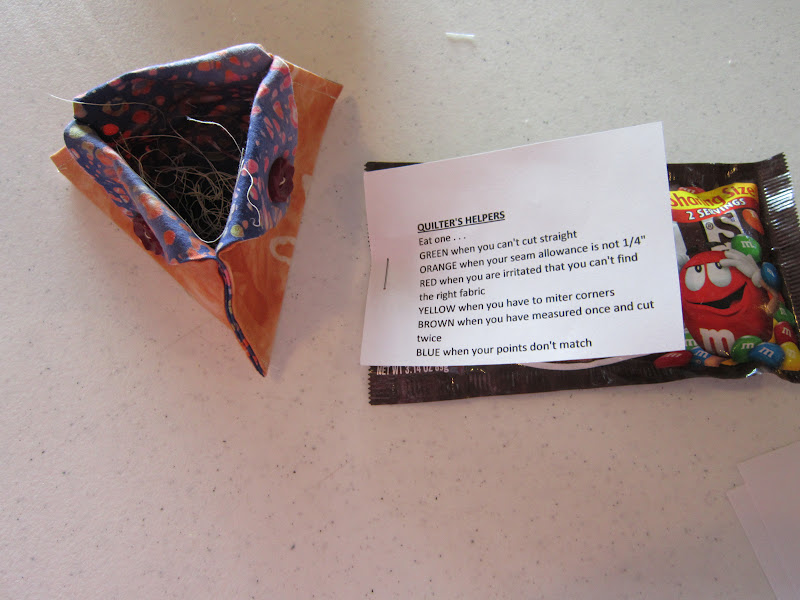
Of course we needed to have our M&Ms for emergencies and our little thread catchers so we could be tidy and neat.

We brought our fabrics with some pre-cut to make our units.

We started making 4-Patch blocks.


Look at all the different combos of fabrics we chose.


First completed block
Three more to go

One of our buddies wasn't able to make it to the Workshop/Retreat.  We missed you, Linda!!

I want you to meet everyone else.
Phyllis at the cutting table.

Carol sewing borders.

Suzan adding sashing.

Sandy making her blocks.


Our view while we were eating lunch.  A tug pushing a load along.

This is not a very good picture because of the glare (and probably the photographer) but this is the deck where we ate our lunch.
This was such a peaceful, relaxing place to have our Workshop/Retreat.

The girls did not finish their tops at the Retreat and we will continue working on them at our regular Bee group meetings coming up.  I will post final pictures when we get the tops done.
Then we will do a Workshop on Quilting on our domestic machines using this project.

One of the things that the girls want me to do on the blog is add tips.  I always have tips on how to save time, be creative, or how to clean an iron.

The TIP for this time is about a tablecloth.  I suggest that each student bring an inexpensive flannel backed tablecloth to use for a design wall.  It helps in laying out the blocks. If you need to take them home to finish you can leave them on the cloth and nothing shifts.


                               -sandi