http://www.themodernquiltguild.com/

Sunday, September 29, 2013

BASKETS #2


The first set of these basket blocks were done earlier this month.


I did these at a fun Sewing Day with some of my buddies.
 
This project has been on hold while I worked on some other things.  This week I finally got a second set of baskets completed.
 
This is the same pattern.  I chose to do the squaring up part from the inside out.  Now I have four of these that are smaller with a little different shape.

There are four more to do for the project and I am thinking about doing something even more different with those.  I think it will give more interest to the completed project.

These are from a Buggy Barn pattern book.

Will post more when the other four are completed.

                                           -sandi


Thursday, September 26, 2013

THE FINISH LINE

I am a member of an Art Quilt Guild called GreatFul Threads.  For our programs this year we have been doing chapters in a book called Art Quilts Workbook by Jane Davila and Elin Waterston.


The chapter I signed up to demo as a program was the chapter on finishing our quilt pieces.

As I went through my collection of quilted pieces I chose some to show as examples of different techniques for finishing the project.
This piece was made by Susan Cooper and given to me.  Susan does lots of art quilts in this style.  She has chosen to leave this raw edge and simply stitch around it with decorative stitches.


This next piece uses a facing method for finishing the edges.  The label is written directly on the facing.


In this piece the "facing" has mitered corners and is stitched down by hand.


I use orphan blocks to make quilt sandwiches and use these to practice quilting patterns or thread before I quilt my main project.  After these are quilted out, I make place mats from them.  In this one I used a technique of finishing by bringing the backing to the front as the binding.  This is not a favorite technique of mine because I don't care for the corner finish.  It is possible to miter these corners, too.


On this one I used a length of jewelry chain as a hanger which I attached to the back with safety pins.


See the safety pin?


For this little art quilt I chose to do the folded triangle corners and then a wooden skewer stick for the hanger.
This pic is rotated!  Do I know why? No, I don't!!


This is an autumn favorite of mine.  This Log Cabin throw has these wonderful fall colors.  On this one I chose to put the hanging sleeve and the label together and then to attach it totally by machine.


A new technique I did was the "no-binding" way of finishing a project by using a facing.


After quilting the piece, cut a strip of fabric to attach to each side of the quilt.  This will be a single fold type of binding that is only on the back.


These strips are cut at 1 1/2".


After stitching this onto the front of the quilt, turn it to the back and fold the other side up to the quilt and press.  I love to use glue to baste the binding to the quilt. Then fold this piece over the backing and stitch down by machine.

I also used it to baste these pieces before stitching.

My label went on the front of this piece.  This will hang on the door to my studio.

 
What a fun chapter to demo!
 
 
-sandi


Saturday, September 21, 2013

THIS WEEK'S UPDATE

I decided to share with you some of what I have been working on this week.  I have three projects going using solids.

I think solids can be challenging because there is not fabric pattern design to hide any flaws in quilting and piecing.

One of the things I am finding that I like about the "modern aesthetic" is how straight line quilting and spiral quilting play such an important role in the quilt design.

Nowadays I start thinking about how I will quilt a piece as soon as I start making the components --  and, sometimes, before I even cut out the first strips, etc.

This first piece I will show you is a quilt I am making for my grandson.  I don't know if I will be able to quilt this one on my domestic machine or not.  More about that in a later post.


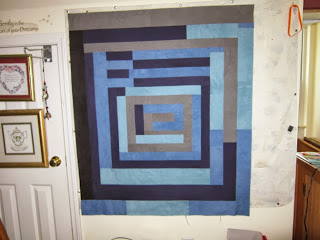
The second one I am working on is a Gee's Bend style quilt.  I am fairly certain I will quilt this one with straight line quilting and change thread color for each color section.


This last piece is my Modern BOM.  I am a little behind.  This is the last block.  I have started sketches of the quilting.  I plan to do a QAYG technique.

 
Maybe I will get a finish of one of these before too long. 
 
-sandi


Tuesday, September 17, 2013

RETURNED FOR REPAIRS

I made this t-shirt quilt for my older grandson about 6 years ago when he finished the fifth grade.  It was a gift from his parents and me.


This was a little on the edge of Modern Quilt because I did not cut each block to the same size and obviously did not line them up in exact, same size rows.  I attempted to get the outside edges reasonably straight.
I chose to cut the logos and get them ready for assembly by laying them all out and then adding whatever size sashing was needed to get them to fit together in something of a rectangular form.
 
The back of this quilt has a tiger stripe fabric because this is the boy/young man who has talked of being a vet for a long time and wanted to attend Auburn University to get that degree.
He is a senior this year and it appears that he will get his wish to attend Auburn!!
 

The logos on this quilt are appliqued.  This quilt has been loved for a number of years and one of the appliques has come loose.  Now it is back at Gram's house for repairs.


The label is in the upper center of the quilt back.
I made this label on my computer and ink jet printer.  It has held up pretty well after MANY washings.

I will take it home to its owner and he can use it to snuggle under again!  It thrills me that my family members always love their quilts.

                                                   -sandi


Monday, September 16, 2013

MAJOR MAKEOVER

I found this really neat old sewing rocker at a neighborhood yard sale.  I have had it for a few years and kept trying to decide how I wanted to re-do her.

She was pretty ratty looking . . .

Take a look at this seat cushion . . .
It is very water stained and paint splattered and faded out . . .

Today I decided to make a seat cushion cover. 

First I chose some bright fabrics to use.

Cut a bunch of strips in random sizes.
 
Now start sewing . . .
 
I am thinking Improv and Quilt As You Go.
I chose a variegated thread to use on the reds, oranges, and yellows.
I love this thread!  It has red/gold/orange/and pink. 

The other thread I chose is a rayon Madeira thread in a luscious green color.
 

Since I was going to do QAYG I chose to press the batting and the backing together so they would better adhere to each other.  I did not use a fusible batting, though.  I just wanted them to stick together by static cling.

I started by placing the first square off-center and then building it like a log cabin block and using straight line quilting all along the strips.

The seat cover is complete.  Now I will simply staple it onto the cushion frame.

The next step:  paint the rocker itself.  What color do I choose?  Black, Grey, White??

I finally settled on Black with a matte finish.  Actually, it was already in the cabinet in the garage and there were 3 full cans.  So, I thought, just use it!

Hubby suggested I put it up on the tailgate of his work truck.  He wasn't worried about any paint spray and there was no wind today.  That was a good thing. 

As you can see it is some bad shade of brown.

First coat of spray went on.

It is already looking good.  I am not very patient with spray paint and often get in such a hurry that I have runs.  Today I was going to be patient and diligent . . . so I decided to make the project not seem so long and drawn out, I cleaned my studio in between coats of paint.  That will be another post later.

She is finished and I love the paint job.  And no runs!!

Now on to getting the cushion put on.


We do not have an electric stapler so Hubby helped with getting the staples in the back.

Not such a pretty sight from this side . . .

However. . .

My improv seat cover.  I love it!

Now to put cushion and rocker together. . .


These first pictures were made outside and the sun was so bright it distorted the colors of the cushion.

Brought it inside to take another picture. . .

That is much better . . .


And this one is the best.  Lil Bit is not too sure about the rocking part of the rocking chair.  LOL  Just look at that mouth!!


                                                    -sandi