
Well, I certainly put this off long enough. Sometimes, I think I would be better off if I could not read so well. Each time I read someone's blog about Quilt As You Go technique I was sure they were leaving out something. I finally decided to jump in and try it this weekend. It is important to credit http://thequiltingedge.blogspot.com for her wonderful tutorial.
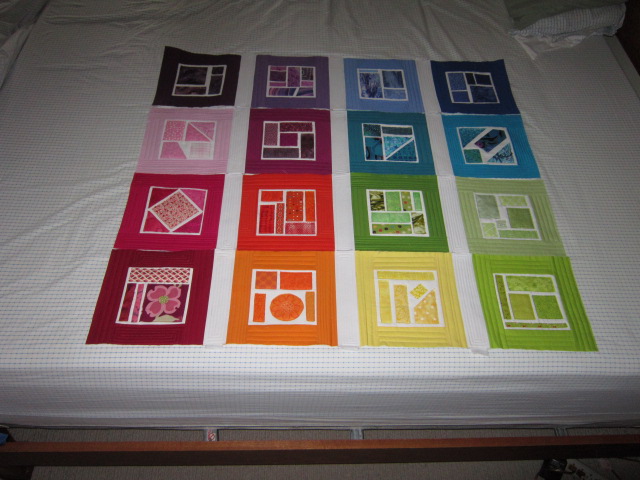
I had these cute ticker tape blocks made and they were just begging for QAYG. They are raw edge applique in the rainbow solids. I used Kona cottons and dug through my stash to find all of the little pieces to make each block. I first wrote about these on April 1 along with other WIPs that I wanted to finish at Retreats this year. I have not made as much progress in that realm as I would have liked. I kept doing new things.


The quilting on each block is straight line -- well mostly straight line. I took the "organic" approach and let them wander a little bit.
After all of these were made, I decided to lay them out. I changed my mind several times and chose to ignore some of the predictable ways to group them.
They are grouped to please me.
Now to join them together to make the quilt.


The first step was attaching the front sashing and the back sashing at the same time.

Then I used glue for basting the back sashing to sew it to the other side of the adjoining block.

As you can see with the block on the right, the two sashings are now in place.

Everything has been quilted and it is ready for the binding.
I chose to put no outside borders on this piece.

Lil Bit is comparing the color of her tennis ball with one of the blocks on the quilt.

Here is the back of the quilt and you can better see the quilting and I used this fun stripey fabric for sashing on the back.

A shot of the whole back of the quilt. I like the funky look of that stripe fabric.

 Love having this on my swing and it goes perfectly with my new gift pillow of the dragonfly that my sister gave me.
Why don't you come over and join me for a spell? We could have a glass of wine and sit and visit on my porch!!
Credit: Rachel at http://www.stitchedincolor.com/ for the idea of the Rainbow blocks.
-sandi
Very, very cute! Thanks for the tutorial and the link...the quilting looks wonderful.
ReplyDeleteThank you, Sharon!
DeleteI love it, I really want to try this!
ReplyDeleteThank you, Julianne, I hope you will try it!!
DeleteOoh, I like it! It makes me smile. Plus your great tips and blog "referrals' ~ ~ You're a gold mine again today :) Thank you.
ReplyDeleteThanks, Kara. Glad you enjoyed it!!
Delete