 The past year has been very busy for me. I have completed more than 15 of my own projects and I agreed to teach another beginning level quilt class. The year before I had officially retired from doing long term classes. I now limit my teaching to Workshops and Retreats.
 However, last fall I agreed to teach a quilting class to a group that gathers at one of the local churches. This program includes studio time and classes in art, knitting, mah jong, doll making, and card playing as well as quiltmaking. It is a senior adult program called Living is for Everyone -- L.I.F.E. for short.
Ladies have been gathering for a number of years to learn quilting techniques and to make a small project or two. This past year the director wanted a teacher to come in to teach a true beginning level quiltmaking course. That is where I came into the picture. I agreed to do this class which had three sessions of 8 weeks each for a total of 24 weeks. The class met weekly for 3 hours to work on the project. Many students wanted to do most of the project during class time. Some others chose to work on it more at home. For those who worked faster they had more studio time to do other projects.
I chose a Bonnie Hunter pattern called Christmas Lights. It is a free pattern offered on Bonnie's Website http://www.quiltville.com/
Bonnie offered this quilt pattern using Christmas fabrics. I chose to stay in the color families she used but not to use Christmas fabrics, so I called this project "Bright Lights".
Our first session was devoted to discussing the pattern and showing the finished quilt so the ladies would know how to choose the fabrics that were needed for the quilt. We would make this quilt top during the first two sessions and the third session was designed to teach the final steps of making the quilt sandwich, pin basting, quilting the project, and adding the label.

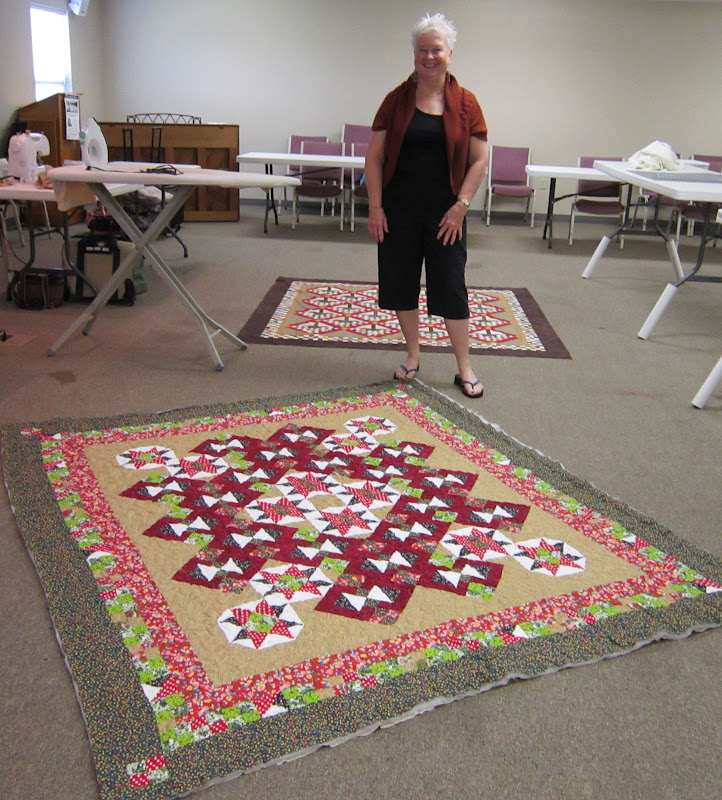
This is my sample quilt for them to see how each fabric was used.

Barbara did a very good job with her quilt. It was fun for them to learn to use any ole' fabric to make the 4-patches and the quilt would turn out beautiful.
 This is Jane's top before she quilted it. Jane used a blue fabric with a very light yellow.
 This is a picture of Jane with a studio project that I am answering a question for her and Ruth and Phyllis are listening to the "teachable moment".
 Lots of discussion goes on when a student brings in a project that she needs ideas for how to set it or sash it.
 Examples of other studio projects from the students.
 Ruth chose purple shades and peach shades to do her quilt which she named "Night Lights". Using the black as her neutral made quite a statement.
Robbie and Ann making pictures of the quilts at Show and Tell.
 Robbie chose another layout for her quilt and added some sashing. Her inner pieced border is set on the diagonal. Interesting, isn't it?
 Ann used a different inner border by interspersing some of the quilt block components with the black and white.
  Sally completed her class project before Christmas break in a baby size. She gave it as a gift and I am sorry I did not have my camera that day to capture it in picture.
She brought these Double Wedding Ring blocks to class one day and wanted to know how to use them. These were all she had. I suggested she do something a little contemporary with them by using some 30s reproduction fabric and not try to duplicate the original blocks. I think this turned out stunningly.
 This is a Tribeca Star pattern that Ruth was using for another studio project.
 Glenda's "Bright Lights" turned out beautifully! Let me just tell you that this is Glenda's FIRST QUILT ever. I am so proud of her!
 Phyllis chose to do some improvisation on her red alternate blocks by adding some sashing. It makes the yellow stars truly float.
The tops were finally completed. We had lots of discussion and demonstrations of backings. Sometimes I showed them a back that was one solid fabric; other times I showed them how to make a pieced back with large squares of fabric; and then I showed them how to make a back with leftover blocks and components to make something rather contemporary looking.

This was a very extensive class with lots of questions and "teachable moments". I was so very pleased with all of the students' projects!!!
Now for a little rest . . .
-sandi
Sandi,
ReplyDeleteI love seeing your class! And especially all the completed quilts--so often a beginning class gets the quilt project started, but doesn't get the top finished. All these gals should be so proud of their quilts!
Thanks for stopping by, Ava. I am glad you could visit with us in our class.
DeleteWow this is so great getting to see all the quilts. You are a terrific teacher and I know they learned a lot. And of course your sample quilt is beautiful.
ReplyDeleteThanks, Bren, and thank you for stopping in to my blog.
DeleteAs I scrolled through these quilts, I wanted to comment on this one and that. Upon seeing the last quilt, I realized I could not comment on each one.
ReplyDeleteHow much fun the class participants had and how rewarding.
Lucy
I'm sorry you could not comment on each picture. I don't know how to set that up. Everyone did seem to enjoy themselves.
Delete